Learning colors is one of the first important steps in a young child’s education. Colors are everywhere, from clothes and toys to flowers, fruits, books, vehicles, and classroom decorations. Children begin noticing colors at an early age, but learning the names and differences between colors can take time and practice. A simple educational tool called a color disc can make this learning process more enjoyable, interactive, and memorable.
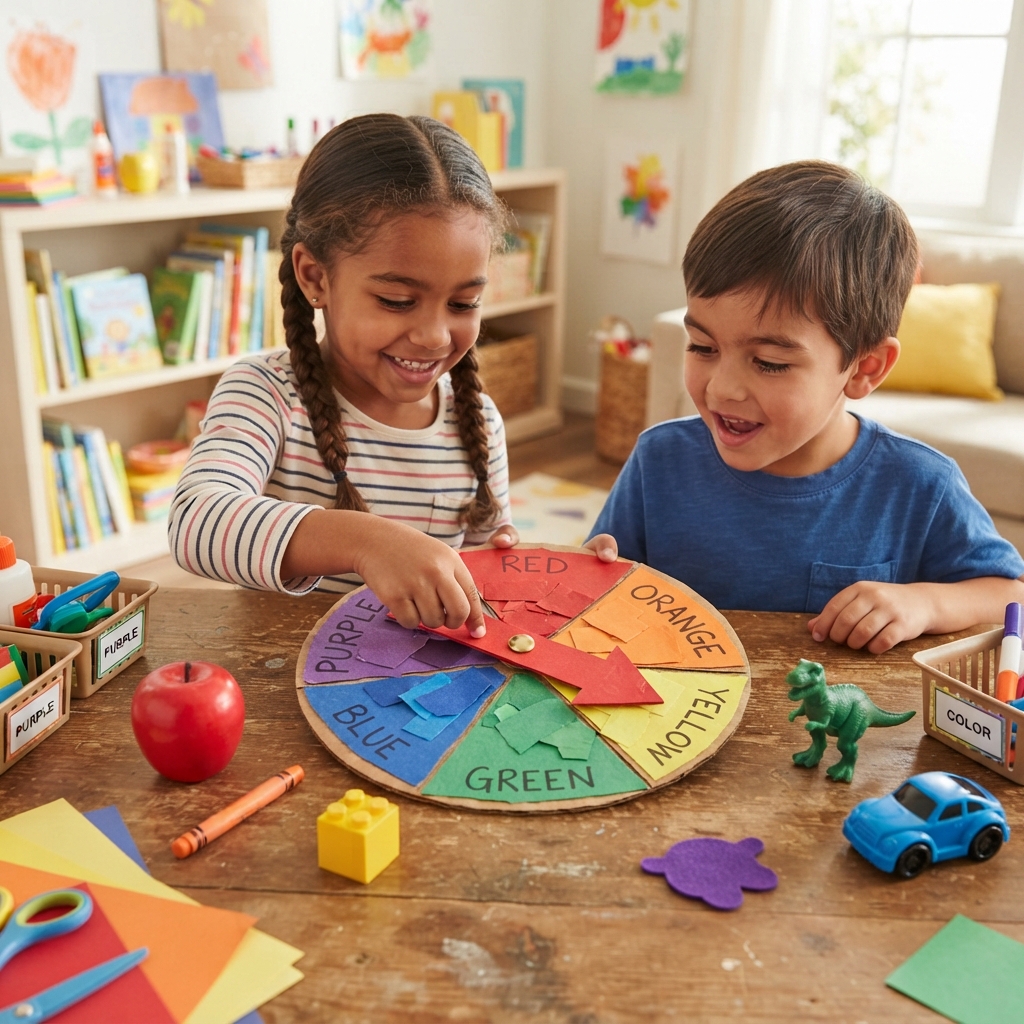
A color disc is a circular learning craft divided into different colored sections. Each section can show a color, its name, a matching picture, or a simple activity. Children can spin the disc, point to colors, match objects, and practice saying or reading color names. The activity can be made from cardboard, paper, recycled packaging, or craft foam, making it inexpensive and easy to create.
The color disc can be used by parents, teachers, preschool educators, and children at home. It can also become part of a larger classroom learning project. With creativity, the same basic disc can be adapted for beginners and advanced learners.
What Is a Color Disc?
A color disc is a round educational tool divided into sections containing different colors. Each section represents one color and can include its written name.
For example, a basic color disc might contain:
- Red
- Blue
- Yellow
- Green
- Orange
- Purple
A pointer can be attached to the center of the disc. When children spin the pointer, it stops on one of the colors.
The teacher can then ask the child to name the color, find an object with the same color, or use the color in a sentence.
The disc can also include additional colors such as pink, brown, black, white, gray, and turquoise.
Why Is a Color Disc Useful?
Children often learn best when they can see, touch, and interact with learning materials. A color disc combines all three.
Instead of simply looking at a list of color names, children can physically spin the disc and participate in a game.
The element of surprise can keep children interested. They do not know which color the pointer will select.
The activity also provides repeated practice. A child can spin the disc many times and practice the same colors without becoming as bored as they might with a traditional worksheet.
Materials Needed
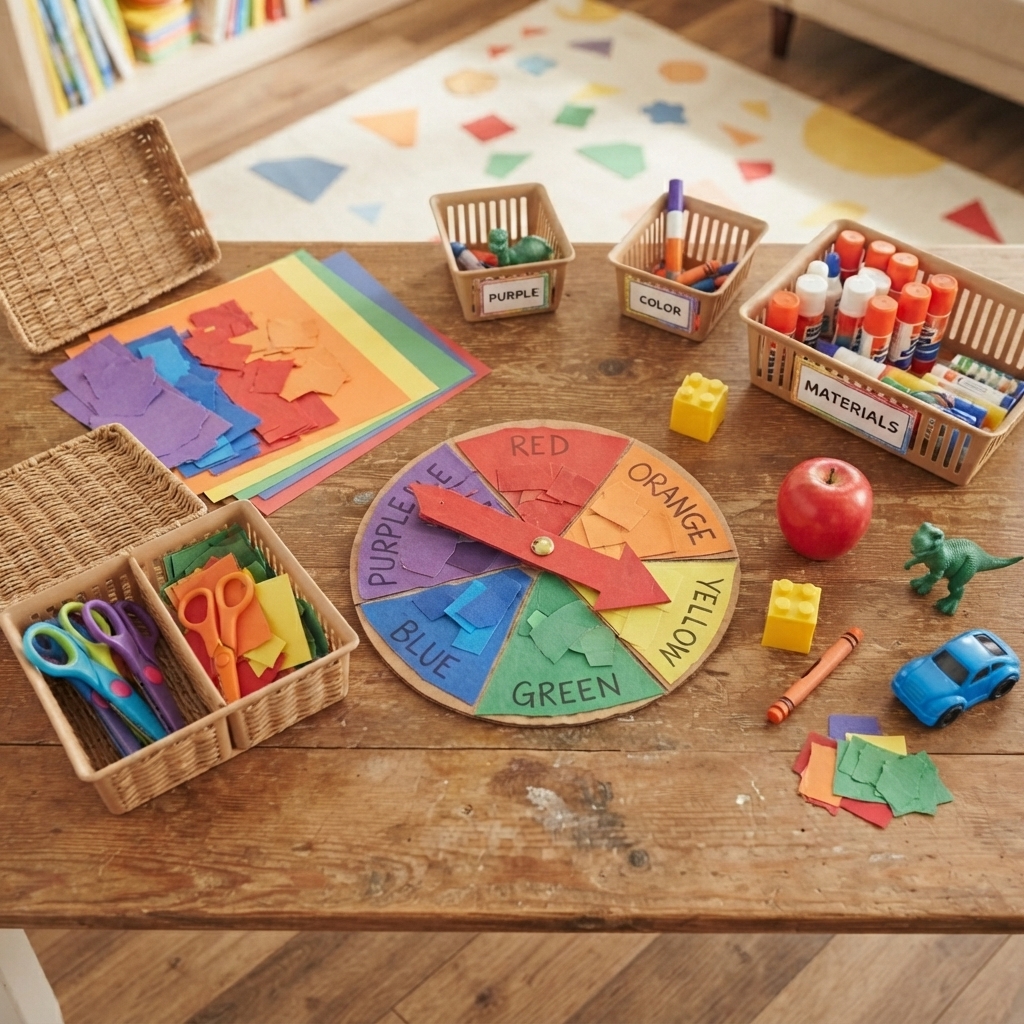
Making a color disc requires only a few simple materials.
The main material is cardboard. Old cereal boxes, shipping boxes, and other clean packaging can be reused.
You will also need colored paper, glue, scissors, a ruler, a pencil, and markers.
A paper fastener can be used to attach the spinner.
Optional materials include stickers, crayons, colored tape, craft foam, and clear adhesive film.
These materials are inexpensive and easy to find in most homes or classrooms.
Designing the Color Disc
Before making the disc, decide which colors children should learn.
For beginners, six basic colors are enough.
Older children can use a disc with eight, ten, or twelve colors.
A ruler can be used to divide the circle into equal sections.
Each section should be large enough to display its color clearly.
The color name can be written in large letters inside or underneath the colored section.
For younger children, the color should be the most noticeable part of each section.
Making the Circle
A large circle can be drawn on cardboard using a compass or a round plate.
The circle should be large enough for children to see the colors easily.
After drawing the circle, lines can be drawn from the center toward the edge to create sections.
For example, a six-color wheel can be divided into six equal sections.
The sections can then be covered with colored paper.
Alternatively, children can color each section with crayons, colored pencils, or markers.
Adding Color Names
Writing the name of each color helps children connect visual information with written language.
For example, the red section can say RED, while the blue section says BLUE.
Large uppercase letters can be helpful for beginners.
Teachers can also write the names in lowercase for children who are practicing reading.
Older students can use the disc to practice spelling the color names.
Creating the Spinner
A simple cardboard arrow can become the pointer.
Cut a long, narrow triangle from cardboard and make a small hole near one end.
Make another hole in the center of the color disc.
Connect the arrow and disc with a paper fastener.
The arrow should be loose enough to turn freely.
Children can decorate the arrow with stars, dots, or other simple patterns.
Learning Basic Colors
The first purpose of the color disc is to teach basic colors.
Parents or teachers can point to a color and say its name.
Children repeat the name.
The process can then be reversed. The adult says a color, and the child points to the correct section.
This simple activity helps children connect spoken words with visual colors.
The Color Matching Game
The disc can become a matching game.
After spinning the pointer, the child must find an object in the room that matches the selected color.
If the pointer lands on green, the child might find a green pencil, toy, book, or plant.
This encourages children to look around their environment and apply what they have learned.
It also shows them that colors are not limited to the learning tool.
Color Hunt Activity
A color hunt can make the activity more exciting.
The child spins the disc and then has thirty seconds to find something with that color.
For example, if the disc lands on yellow, the child searches for something yellow.
This activity combines learning with movement and observation.
It can be played indoors or outdoors.
Teachers can organize a classroom color hunt by asking students to find objects around the room.
Learning Secondary Colors
Once children understand basic colors, the disc can introduce secondary colors.
The main examples are:
Orange
Green
Purple
Teachers can explain that some colors can be made by mixing other colors.
For example, yellow and blue can create green, while red and yellow can create orange.
A color disc can therefore become an introduction to color mixing.
Adding Color-Mixing Activities
A more advanced disc can contain color combinations rather than only individual colors.
One section might say:
RED + YELLOW
The child must identify the resulting color: orange.
Another section might say:
BLUE + YELLOW
The answer is green.
This turns the disc into a simple art and science activity.
Children can experiment with paint or colored paper to test the combinations.
Learning Light and Dark Colors
Older children can learn about shades and tones.
The disc can include light blue, dark blue, light green, and dark green.
Students can compare the colors and decide which is lighter or darker.
This helps develop visual observation.
The same activity can be used with different shades of pink, purple, orange, or gray.
Learning Warm and Cool Colors
The color disc can also introduce the concepts of warm and cool colors.
Warm colors often include red, orange, and yellow.
Cool colors often include blue, green, and purple.
The disc can be divided into two areas to help students understand this difference.
Children can sort colored objects into warm and cool groups.
This connects the color activity with basic art education.
Using Pictures on the Disc
Pictures can make the color disc more useful for young children.
A red section might include a picture of an apple.
A yellow section might include a banana.
A green section might include a leaf.
A blue section might include the sky or ocean.
These pictures help children connect colors with familiar objects.
Using the Disc for Vocabulary
The color disc can also support language development.
After selecting a color, the child can name three objects that have that color.
For example, if the disc selects blue, the child might say:
“Blue sky.”
“Blue shirt.”
“Blue pencil.”
This helps children build simple phrases and sentences.
Older children can create more complex sentences using color words.
Learning Colors in Another Language
The color disc can be adapted for foreign-language learning.
The color names can be written in the language being studied.
For example, children learning French could practice words such as rouge, bleu, vert, and jaune.
The teacher can say the color in English, and the child identifies the corresponding foreign-language word.
This makes vocabulary practice more interactive.
Creating a Classroom Color Disc
A large color disc can be displayed on a classroom wall.
Instead of using a small spinner, the teacher can use a large arrow.
Students can take turns selecting a color.
The selected color can become the theme for a short classroom activity.
For example, a green selection might lead students to draw leaves, find green objects, or name green animals.
This makes the disc useful beyond a single lesson.
Educational Benefits
The color disc provides several educational benefits.
It improves color recognition and vocabulary.
It develops observation because children must compare different colors.
It supports memory because children repeatedly practice color names.
The spinning action also develops hand-eye coordination.
Children learn to follow simple rules and take turns when playing with others.
Developing Fine Motor Skills
Making the disc can be just as educational as using it.
Children can practice cutting, gluing, coloring, and drawing.
Attaching the spinner requires careful hand movement.
These activities help develop fine motor skills.
Teachers can divide the project into simple steps so children can participate according to their abilities.
Encouraging Creativity
Children can design their own color discs.
They can choose the number of sections, add drawings, decorate the borders, and create their own color games.
A child might make an animal-themed color disc.
Another might create a rainbow-themed disc.
Giving children creative control can increase their interest in the activity.
Recycling Benefits
The color disc is an excellent recycling craft.
Old cardboard packaging can become the base.
Paper scraps can be used for colored sections.
Unused cardboard can become the spinner.
This demonstrates how everyday waste can be transformed into a useful educational object.
It also encourages children to think creatively about recycling.
Using the Disc at Home
Parents can use the color disc for short learning sessions.
A few minutes each day can provide valuable repetition.
Children can spin the disc during playtime and then search for objects that match the selected color.
The disc can also be used while learning new vocabulary.
Because it is reusable, the same tool can support learning for a long time.
Safety Considerations
Children should use scissors carefully and according to their age.
Adults should help younger children with cutting cardboard.
The paper fastener should be attached securely.
Small pieces should be kept away from very young children.
The disc should have smooth edges so children can handle it comfortably.
Conclusion
The color disc is a simple, creative, and effective tool for helping children learn colors. Made from cardboard, paper, and other inexpensive materials, it can transform color practice into an interactive game.
Children can spin the disc, name colors, match objects, search for colors around the room, practice vocabulary, and explore color combinations. Older children can use the same tool to study shades, warm and cool colors, and basic color mixing.
The activity also provides opportunities for creativity, recycling, movement, and communication. Children can help make the disc themselves, decorating it with drawings, patterns, and colorful pictures.
The color disc is useful at home and in school. Teachers can use it during lessons, while parents can include it in everyday learning activities. It can also become part of a larger collection of handmade educational games.
Most importantly, the color disc shows children that learning can be active and enjoyable. Instead of simply memorizing color names, children can see, touch, spin, search, compare, and create. A simple cardboard circle can therefore become a valuable learning tool that helps children develop color recognition, vocabulary, observation, memory, creativity, and confidence.