Creating a 3D textbook is a creative and educational craft project that transforms an ordinary book idea into a three-dimensional model. Instead of making a flat paper book, students can build a miniature textbook with raised covers, layered pages, pop-up illustrations, pockets, labels, and other details. This project is an excellent activity for children because it combines reading, writing, drawing, design, and hands-on construction.
A 3D textbook can be created around almost any subject. It can be a mathematics book filled with numbers and shapes, a science textbook showing plants and animals, a history book featuring important events, or a geography book containing maps and landscapes. Students can choose a subject they enjoy and then turn the information into an attractive three-dimensional learning resource.
The project does not require expensive materials. Cardboard, colored paper, glue, scissors, markers, pencils, and recycled packaging can be enough. With careful planning and imagination, these simple supplies can become a unique textbook that looks interesting and helps explain educational ideas.
What Is a 3D Textbook?
A 3D textbook is a handmade educational model that presents information using three-dimensional elements. A traditional textbook has flat pages, while a 3D textbook can contain parts that rise from the page, fold outward, open into compartments, or stand upright.
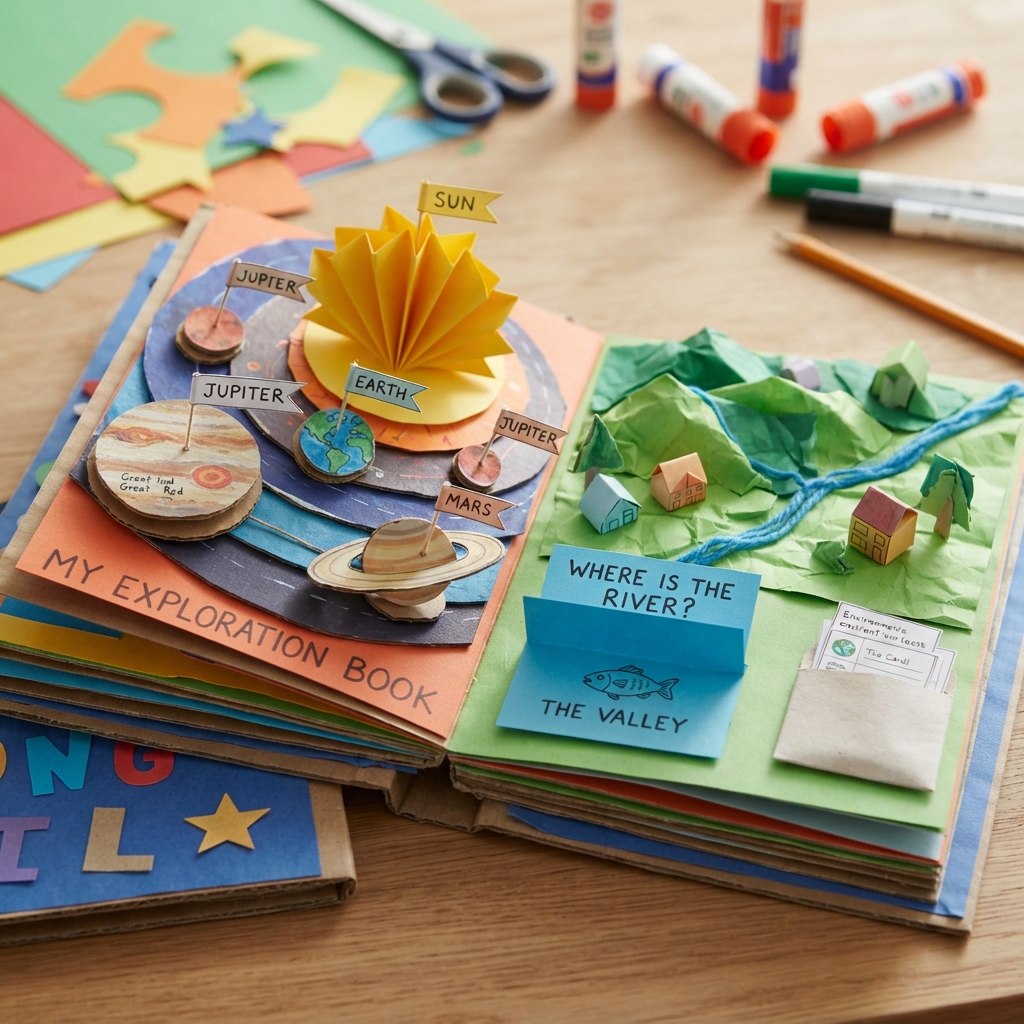
For example, a science textbook about the human body could have a raised heart, lungs, and skeleton. A plant science book could contain a three-dimensional flower with separate petals, leaves, roots, and stems. A geography textbook could include a raised mountain range, a paper river, and miniature buildings.
The purpose is not simply to make a book look beautiful. The three-dimensional elements should help explain the subject and make learning more memorable.
Materials Needed
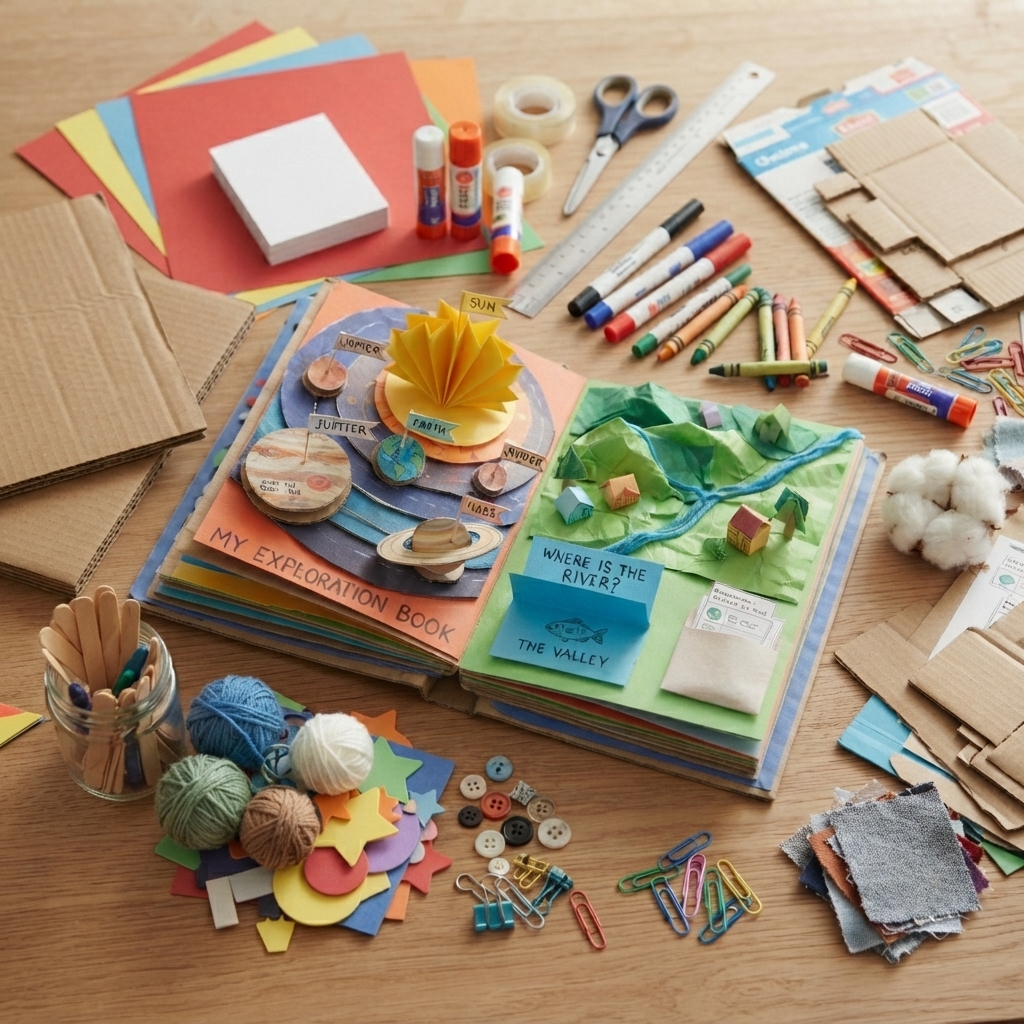
The materials for a 3D textbook are simple and affordable. The main structure can be made from two pieces of thick cardboard. These pieces become the front and back covers.
Colored paper can be used for the pages, decorations, titles, and illustrations. White paper can be used for writing information and creating diagrams.
Other useful materials include glue, tape, scissors, a ruler, pencils, colored markers, crayons, and an eraser. Recycled cardboard from cereal boxes or packaging can provide additional support.
Students can also use craft sticks, yarn, cotton, foam sheets, buttons, paper clips, and small pieces of fabric to create special effects. The exact materials depend on the subject and design.
Choosing a Subject
The first creative decision is choosing the topic of the textbook. Students should select a subject that provides opportunities for pictures, diagrams, and three-dimensional features.
Science is an excellent choice because many scientific objects can be represented in 3D. A textbook about the solar system could contain raised planets and a pop-up sun. A biology book could show a three-dimensional cell.
Mathematics can also work well. Students can create raised geometric shapes, number cards, graphs, and fraction models.
History books can include miniature buildings, historical objects, flags, or timelines. Geography books can feature maps, mountains, rivers, and landmarks.
Choosing the topic early makes it easier to plan the pages and collect appropriate materials.
Planning the Book
Good planning is essential before construction begins. Students should decide how many pages they want and what information will appear on each page.
A small 3D textbook could have five to ten main pages. Each page can focus on one idea.
For example, a science textbook about plants might have pages about seeds, roots, stems, leaves, flowers, and fruits.
Students can create a simple plan on paper before cutting anything. They should decide where the text, pictures, and 3D elements will be placed.
Planning prevents the pages from becoming too crowded and helps create a more organized final product.
Making the Covers
The covers provide the foundation of the textbook. Two rectangular pieces of cardboard can be cut to the desired size.
The cardboard can be covered with colored paper to create a clean appearance. A title can be added to the front cover using large letters.
For example, the cover might say “My 3D Science Textbook” or “Exploring the Solar System.”
Students can add a small illustration related to the subject. A science book might have a planet, microscope, or leaf. A geography book could have a globe or map.
The back cover can contain the student’s name, class, or a short description of the project.
Creating the Pages
The pages can be made from thick paper or lightweight cardstock. Each page should be slightly smaller than the covers.
Several sheets can be attached along one side using glue, tape, ribbon, or another simple binding method.
Students should avoid using too many pages because the 3D elements will require additional space. A smaller number of carefully designed pages often looks better than a large book with crowded information.
Each page should have a clear purpose.
Adding 3D Elements
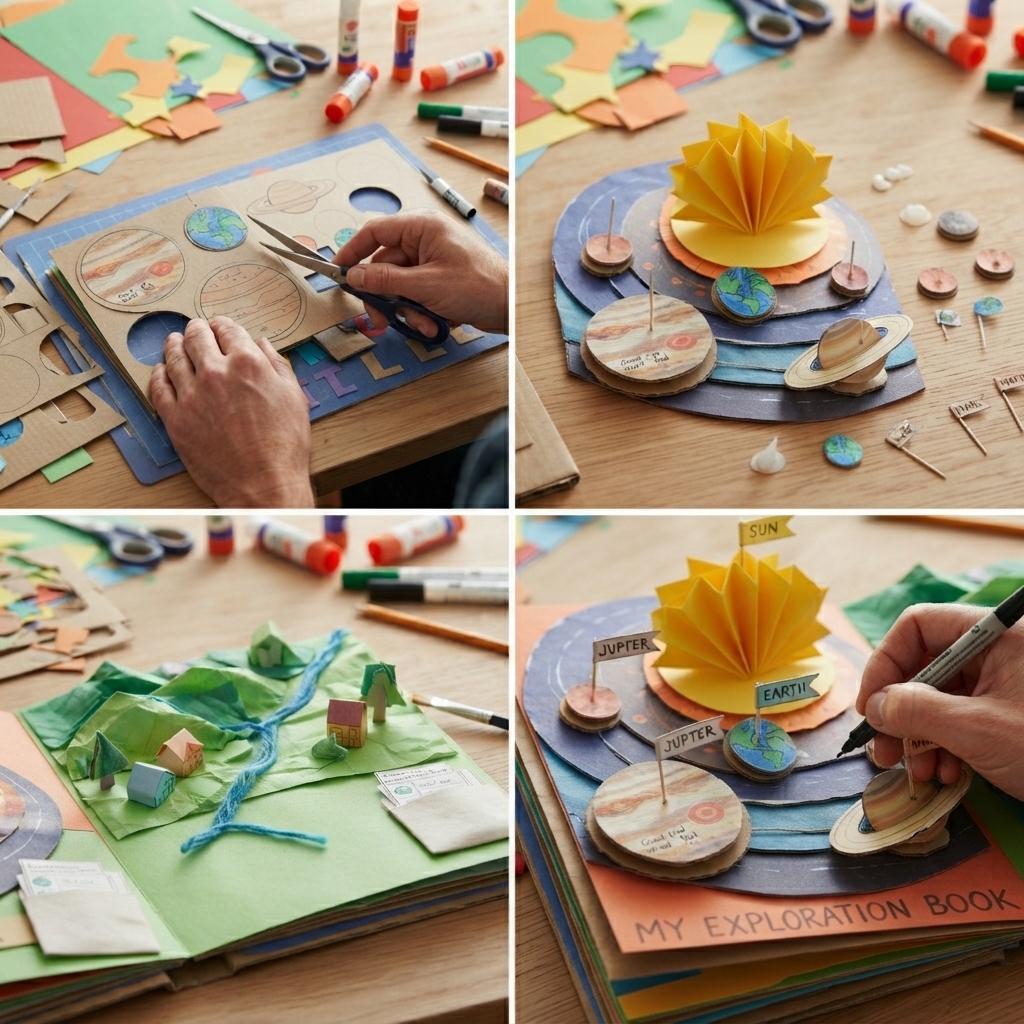
The main feature of the project is the three-dimensional construction. There are many techniques students can use.
One simple technique is layering. Several pieces of paper can be cut into the same shape and stacked using small folded strips of cardboard between them. This creates a raised effect.
Another technique is folding. Paper can be folded into steps, boxes, or triangular shapes that rise from the page.
Pop-up mechanisms can also be created by cutting and folding sections of the paper. These mechanisms allow illustrations to stand when the page is opened.
Creating Pop-Up Pictures
Pop-up pictures can make a 3D textbook exciting. A simple pop-up can be made by cutting two short parallel lines in a sheet of paper and folding the resulting section inward.
A picture can then be attached to the folded section. When the page opens, the picture rises.
Students can use this technique for animals, plants, buildings, planets, or other objects.
The pop-up should not be too large because it needs to close inside the book.
Making Raised Diagrams
Diagrams are especially useful in educational textbooks. Students can create raised diagrams by cutting shapes from cardboard and attaching them to the page.
For a science textbook, a cell can be represented using several raised shapes. Each part can have a label.
A diagram of a flower can contain separate petals, leaves, and a stem. A diagram of the Earth can include layers made from stacked paper circles.
The raised structure makes it easier for readers to distinguish different parts.
Creating Miniature Maps
A geography textbook can include a three-dimensional map. A map can be drawn on cardboard, while mountains can be represented using folded paper or small pieces of cardboard.
Rivers can be made from blue strips of paper. Forests can be represented by small green paper trees.
Labels can identify countries, cities, oceans, mountains, and rivers.
A 3D map turns a flat geography lesson into an interactive model.
Designing a 3D Science Page
Science offers countless possibilities for a three-dimensional textbook.
For example, students creating a solar system page can use circles of different sizes for planets. The circles can be layered to give them depth.
Small pieces of string can connect the planets to labels. The background can be covered with dark paper and decorated with stars.
A biology page could contain a raised animal, plant, or cell.
The important thing is to ensure that the 3D model supports the educational information rather than simply acting as decoration.
Adding Text and Labels
A textbook must contain information. Students can write short explanations beside their 3D models.
Large headings can identify each topic, while smaller labels can identify individual parts.
For example, a plant page might include labels such as “Root,” “Stem,” “Leaf,” and “Flower.”
Text should be easy to read. Dark writing on a light background usually provides good contrast.
Students can use handwriting or print information using a computer and attach the printed text to the pages.
Making Interactive Pockets
Small paper pockets can be attached to the pages. These pockets can contain cards, questions, facts, vocabulary words, or miniature diagrams.
For example, a mathematics textbook could have a pocket containing multiplication cards. A science book could contain cards with animal facts.
Interactive pockets make the textbook more engaging because readers can remove and examine the cards.
Adding Flaps
Paper flaps are another simple 3D technique. A flap is attached along one edge and can be lifted to reveal information underneath.
A question can be written on top of the flap, with the answer underneath.
This is particularly useful for educational projects because it turns the book into a self-testing activity.
For example, the flap might ask, “What is the largest planet?” The answer can be hidden underneath.
Creating a Miniature Timeline
History textbooks can benefit from three-dimensional timelines. A long strip of paper can run across a page, with important events placed along it.
Small raised cards can mark different dates. Each card can contain a short description or illustration.
This makes historical information easier to organize chronologically.
Students can also use small folded paper shapes to represent important buildings, inventions, or historical objects.
Decorating the Textbook
Decoration should support the subject without making the pages difficult to read.
Students can create borders using colored paper or markers. Small illustrations can fill empty spaces.
Stickers, paper shapes, and recycled materials can add personality to the book.
However, too many decorations can make a page confusing. The best 3D textbooks usually balance colorful design with clear educational information.
Using Recycled Materials
A 3D textbook is a perfect project for recycling. Old cardboard boxes can become covers and structural supports.
Used envelopes can become pockets. Magazine pages can provide colorful pictures. Paper packaging can be cut into shapes.
This teaches children that materials do not always need to be new to be useful.
Recycling also makes the project affordable for classrooms where many students need materials.
Educational Benefits
Creating a 3D textbook has many educational advantages. First, it encourages active learning. Instead of simply reading information, students physically construct representations of the ideas they are studying.
The project also improves memory because students connect information with visual and physical objects.
Fine motor skills develop through cutting, folding, drawing, and gluing. Planning and problem-solving skills also improve as students decide how to construct different features.
The activity can also encourage research. Students must find accurate information before writing the content of their textbook.
Developing Creativity
There is no single correct design for a 3D textbook. Students can experiment with different colors, shapes, materials, and construction techniques.
One student may create a colorful science book, while another may create a realistic geography book.
The project gives students an opportunity to express their personality through design while still meeting educational goals.
Presenting the Finished Book
When the textbook is finished, students can present it to classmates or teachers.
They can explain the subject, describe how they created the 3D elements, and demonstrate interactive features such as pop-ups, flaps, and pockets.
A presentation allows students to practice communication skills and explain what they learned during the project.
The finished book can also be displayed during a school exhibition.
Safety Considerations
Children should use scissors carefully and follow age-appropriate instructions. Sharp tools should only be used with adult supervision.
Glue should be used carefully, especially when working with small pieces. The workspace should remain clean and organized.
Small decorations such as buttons and beads should be kept away from very young children because they may present a choking hazard.
Safety allows children to focus on creativity without unnecessary risks.
Conclusion
Creating a 3D textbook is a wonderful way to combine education and creativity. Instead of making a traditional flat book, students can construct pages containing pop-up pictures, raised diagrams, miniature maps, flaps, pockets, labels, and other interactive features.
The project can be adapted to almost any school subject. Science students can build cells, plants, animals, or planets. Geography students can create raised maps. Mathematics students can construct geometric shapes and number models. History students can design timelines and miniature historical scenes.
The activity develops important skills, including planning, measuring, cutting, folding, problem-solving, research, and communication. It also encourages students to recycle materials and use their imagination.
Most importantly, a 3D textbook turns learning into something students can see, touch, and explore. The finished book becomes more than a school assignment. It becomes a personal learning tool that demonstrates knowledge through creativity and construction.
With simple materials and careful planning, anyone can create a unique 3D textbook. Whether it is displayed in a classroom, presented at a school exhibition, or kept as a personal project, this handmade book can make educational information more memorable, engaging, and enjoyable.