Making a giant cardboard pencil is a fun, creative, and educational craft project that transforms ordinary cardboard into a large colorful pencil. This oversized pencil can be used as a school decoration, classroom display, art project, back-to-school craft, or creative activity for children. Although a real pencil is small enough to fit in a hand, a cardboard pencil can be made large enough to stand on a desk, hang on a classroom wall, or become part of a school-themed display.
The project is especially interesting because it uses simple materials. Old cardboard boxes, paper, glue, paint, scissors, and markers can be transformed into a giant pencil with a realistic shape. Children can learn about shapes, measurements, colors, recycling, and design while creating the project.
Why Make a Giant Cardboard Pencil?
Pencils are among the most familiar objects associated with school. Students use them to write, draw, calculate, take notes, and complete assignments. A giant pencil represents learning, creativity, and education.
Making a large cardboard version gives children an opportunity to explore an everyday object in a completely different way. They can observe the shape of a pencil and then reproduce it using flat pieces of cardboard.
The project can also be used to decorate a classroom. Several giant pencils in different colors can be placed around a bulletin board. A large pencil can also be used as a sign for a school exhibition or back-to-school event.
Another advantage is that the project encourages recycling. Instead of throwing away cardboard boxes, children can give them a new purpose.
Materials Needed
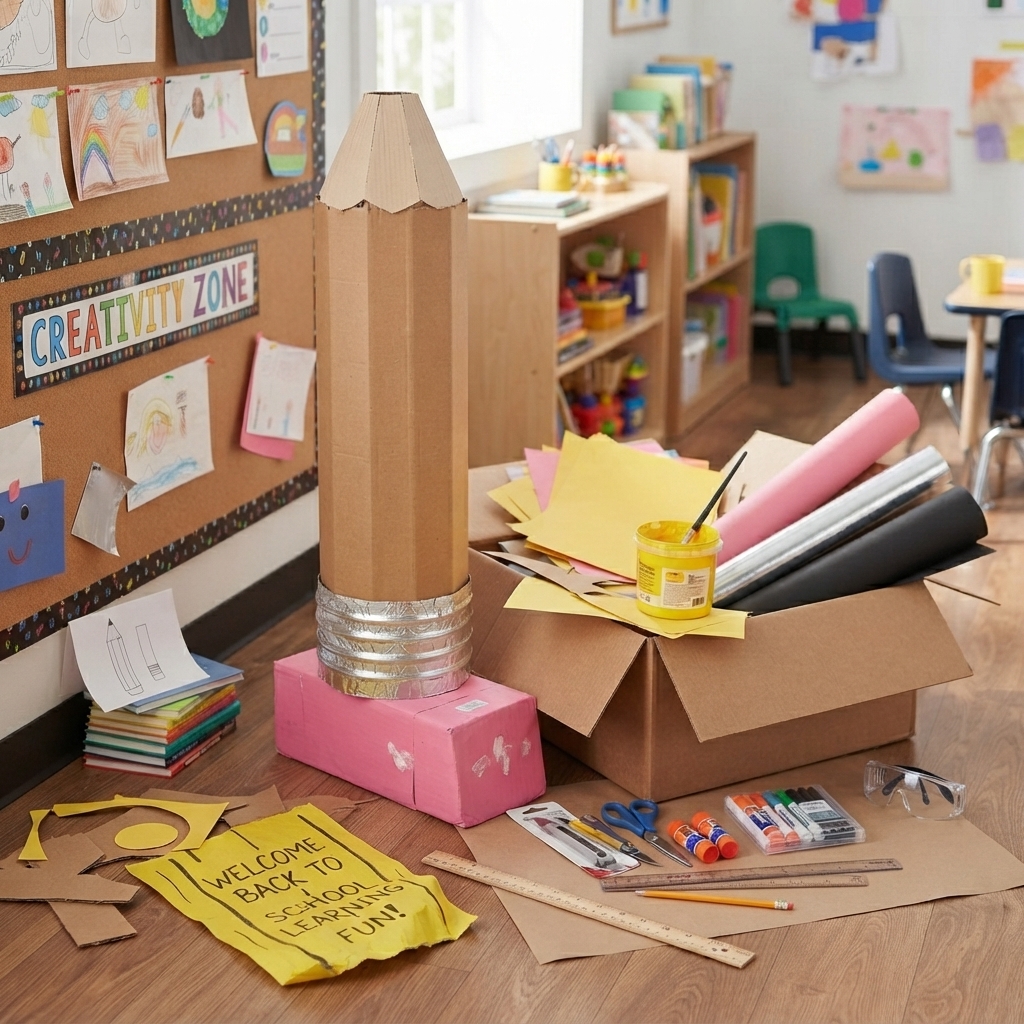
The materials for making a giant cardboard pencil are simple. The most important material is a large piece of cardboard. Several smaller pieces can also be joined together if one large piece is not available.
Other materials include yellow paper or yellow paint, pink or red paper for the eraser, gray or silver paper for the metal part, black or dark gray paper for the pencil tip, glue, tape, scissors, a ruler, a pencil, and markers.
A craft knife may sometimes be useful for cutting thick cardboard, but it should only be used by an adult or under close adult supervision.
Optional materials include colored tape, stickers, glitter, string, cardboard tubes, and recycled packaging.
Planning the Design
Before cutting the cardboard, it is important to plan the shape and size of the pencil. A giant pencil can be made two-dimensional as a flat wall decoration or three-dimensional as a standing model.
For a simple classroom craft, a flat pencil is easiest. A large pencil shape can be drawn on cardboard and cut out.
For a three-dimensional pencil, several cardboard pieces can be joined to form a long body. The design can be more challenging but creates a stronger visual effect.
Children should decide whether they want the pencil to be horizontal, vertical, or slightly tilted.
Drawing the Pencil Shape
The first step is drawing the main body. A long rectangle can represent the wooden pencil body.
A ruler can help create straight edges. The body should be long and narrow, similar to the shape of a real pencil.
At one end, the pencil should gradually become narrower to form the sharpened tip. At the other end, the eraser can be added.
The shape does not need to be perfect. A handmade appearance can make the project more personal.
Creating the Pencil Tip
The pencil tip is one of the most important parts of the design. It can be made by drawing a triangle at the front of the cardboard pencil.
The wooden part of the pencil can be represented using light brown or beige paper. Lines can be drawn along the wood to make it look more realistic.
At the center of the triangular tip, a smaller dark triangle can represent the graphite.
Black, dark gray, or dark brown paper can be used for the graphite.
For a three-dimensional model, the tip can be made from several triangular pieces of cardboard joined together.
Making the Pencil Body
The main body should be covered with bright yellow paper or painted yellow. Yellow is a traditional pencil color and immediately makes the object recognizable.
Children can add long black lines along the body to imitate the edges of a real pencil.
A ruler can help create straight decorative lines.
The name of the child, school, or classroom can also be written on the pencil body. For example, the pencil could say “WELCOME BACK TO SCHOOL” or “LEARNING IS FUN.”
This makes the giant pencil useful as a personalized classroom decoration.
Adding the Metal Ferrule
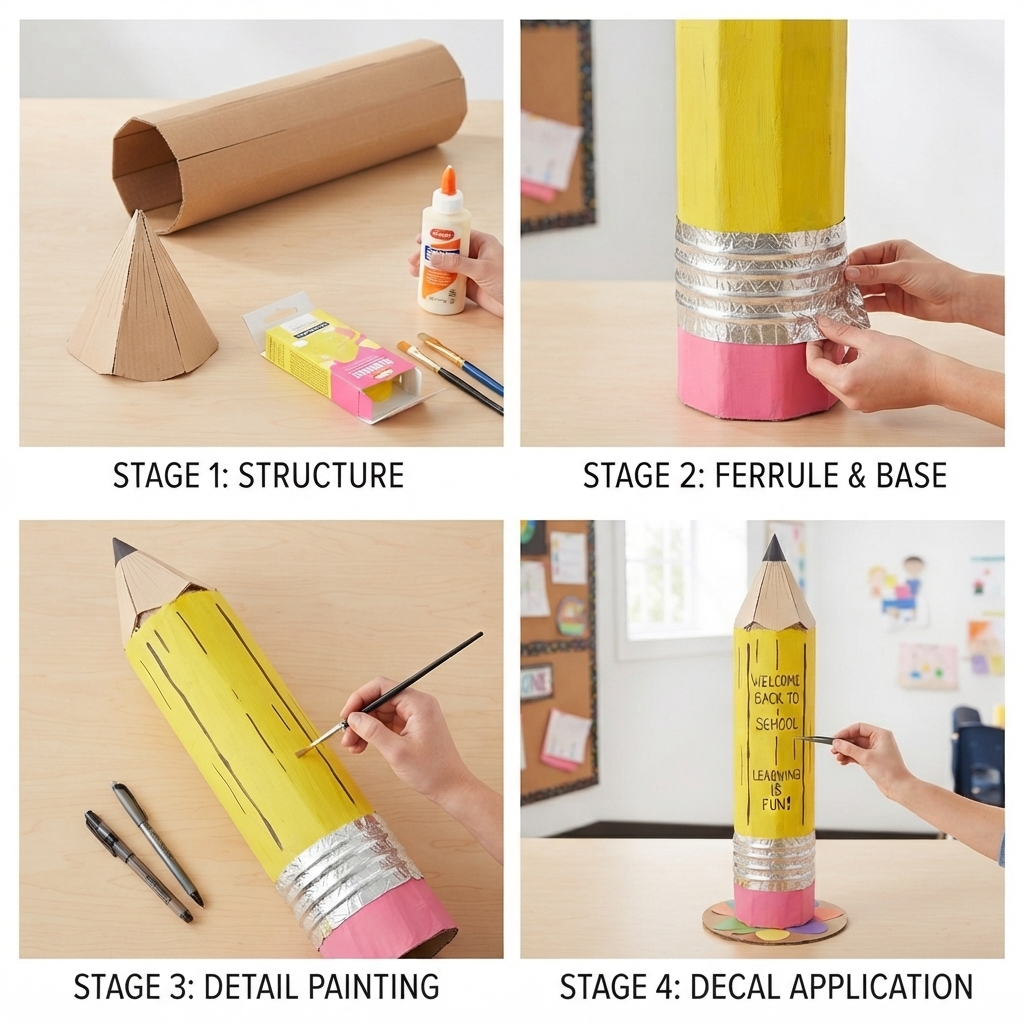
The metal part between the pencil body and the eraser is called the ferrule. It can be represented using gray or silver paper.
A rectangular piece of silver-colored paper can be attached to the back of the yellow pencil body.
Several horizontal lines can be drawn across the ferrule to imitate the ridges found on real pencils.
For an even more interesting appearance, aluminum foil can be used carefully to create a shiny metallic effect.
Creating the Eraser
The eraser is placed at the end of the pencil. It can be made from pink, red, or light-colored paper.
A rectangular piece of cardboard covered with pink paper can represent the eraser.
For a three-dimensional pencil, several layers of cardboard can be stacked to make the eraser thicker.
A small curved edge can be added to make it look more realistic.
Adding Details
Small details can make a giant cardboard pencil much more attractive.
Children can draw tiny lines along the wooden tip. They can add highlights to the yellow body or create decorative patterns.
A school logo, classroom number, student’s name, or motivational message can be written along the pencil.
Small paper stars, circles, hearts, or flowers can also be added.
However, the decorations should not hide the basic pencil shape.
Making a Three-Dimensional Pencil
A three-dimensional giant pencil requires more cardboard but can create an impressive display.
One approach is to create a long cardboard tube. A large sheet of cardboard can be rolled carefully into a cylinder and secured with tape or glue.
The cylinder becomes the pencil body.
A cone-shaped tip can be created from cardboard and attached to one end. The cone can then be covered with brown or beige paper, with a dark graphite point at the center.
The other end can be decorated with a cardboard ferrule and eraser.
This version can stand upright if a strong base is added.
Creating a Stable Base
If the giant pencil is designed to stand on the floor or a table, it needs a stable base.
A flat piece of cardboard can be attached to the bottom. Another option is to create two triangular cardboard supports and attach them to the sides.
The base should be wide enough to prevent the pencil from falling over.
Children should test the model carefully before displaying it.
Decorating a Classroom
A giant cardboard pencil can become an excellent classroom decoration.
Several pencils can be made and placed around a bulletin board. Each pencil can contain a student’s name.
Another idea is to create a large pencil border around a classroom display. Smaller cardboard pencils can be arranged beside books, rulers, crayons, and paper apples.
A large pencil can also be placed near the classroom entrance with a welcome message.
Creating a Back-to-School Display
The giant pencil is especially suitable for back-to-school decorations.
A large pencil can be combined with a cardboard school bus, paper books, miniature backpacks, and colorful letters.
The pencil can contain a message such as “Welcome Back” or “Ready to Learn.”
Teachers can invite students to decorate smaller pencils with their names and place them around the main display.
This creates a colorful and welcoming environment.
Using the Pencil for Learning Activities
The giant cardboard pencil can also be used as part of an educational activity.
For example, teachers can attach vocabulary words to the pencil. Each word can be written on a small card.
A mathematics class could use the pencil as a visual object for measuring length. Students could estimate how long the giant pencil is and then measure it using rulers or measuring tapes.
An art class could discuss colors, shapes, patterns, and design.
This makes the craft useful beyond decoration.
Turning It into a Writing Display
Another creative idea is to use the pencil as a writing display. Children can write short messages on paper strips and attach them to the pencil.
For example, each student can write one thing they hope to learn during the school year.
The strips can be arranged around the pencil to create a colorful classroom display.
This combines creativity with personal reflection.
Recycling Cardboard
The giant pencil is an excellent example of creative recycling. Cardboard boxes are commonly discarded after products are unpacked.
Instead of throwing them away, children can reuse them for craft projects.
Old cereal boxes can provide smaller pieces, while large shipping boxes can provide the main body.
This teaches children that materials can have more than one purpose.
Recycling also reduces waste and encourages responsible habits.
Educational Benefits
Making a giant cardboard pencil helps develop fine motor skills. Cutting, drawing, folding, gluing, and decorating require hand control and coordination.
The activity also encourages planning. Children must decide how large the pencil will be and how the different sections will fit together.
Mathematical skills can be practiced through measuring lengths, comparing sizes, and calculating proportions.
The project also encourages creativity because children can choose their own colors, messages, patterns, and decorations.
Problem-Solving Skills
Crafting a large model often creates unexpected challenges. The cardboard might bend, the paper might wrinkle, or the pencil might not stand correctly.
Children can learn to solve these problems by adding supports, changing materials, or adjusting the design.
For example, if the body bends, another cardboard layer can be attached behind it. If the base is unstable, it can be made wider.
These small challenges teach persistence and flexible thinking.
Working as a Team
A giant pencil can also be created as a group project. Several students can work together.
One student can draw the design, another can cut the cardboard, another can prepare the decorations, and others can attach the different pieces.
Teamwork teaches children how to share responsibilities and listen to different ideas.
The finished pencil becomes a project that represents the work of the entire group.
Safety Tips
Safety is important when working with cardboard. Children should use scissors carefully and should ask an adult for help with thick cardboard.
Craft knives and other sharp cutting tools should only be used by adults or under close supervision.
Glue and paint should be used carefully, and the workspace should be kept clean.
If the pencil is large enough to stand on the floor, it should be placed somewhere stable where it will not block walkways or fall onto people.
Conclusion
Making a giant cardboard pencil is a creative and educational project that can turn simple recycled materials into an impressive school decoration. With cardboard, paper, glue, paint, and imagination, children can create a large pencil complete with a wooden tip, graphite point, yellow body, metal ferrule, and colorful eraser.
The project provides opportunities to learn about shapes, measurement, design, recycling, and construction. It also develops fine motor skills, problem-solving abilities, patience, and creativity.
A giant pencil can serve many purposes. It can decorate a classroom, welcome students back to school, display children’s names, support learning activities, or become part of a larger school-themed craft scene.
The most valuable part of the project is the creative process. Children learn that an ordinary cardboard box does not have to become waste. With imagination, it can become something large, colorful, and meaningful.
Whether it is created by one child or by an entire class, a giant cardboard pencil is a wonderful symbol of learning and creativity. It reminds students that every great idea can begin with something simple—a piece of cardboard, a pencil, and the imagination to turn them into something new.