A small foldable whiteboard is a useful, creative, and practical project that can be made from simple materials. It is especially suitable for children, students, teachers, parents, and anyone who wants a compact writing surface that can be folded and stored easily. Instead of buying an expensive board, you can create a homemade version using cardboard, white paper, plastic sheets, tape, and a few basic craft supplies.
A foldable whiteboard can be used for writing, drawing, practicing letters and numbers, solving mathematics problems, making to-do lists, playing educational games, or displaying short messages. Because it can fold flat, it is easy to carry in a school bag, place on a desk, or store in a drawer.
This project also provides an excellent opportunity to reuse cardboard and other household materials. With careful construction, a simple piece of packaging can become a useful educational tool.
What Is a Foldable Whiteboard?
A foldable whiteboard is a writing board made from one or more connected panels. The panels are joined with a flexible hinge so that the board can open flat and close when it is not being used.
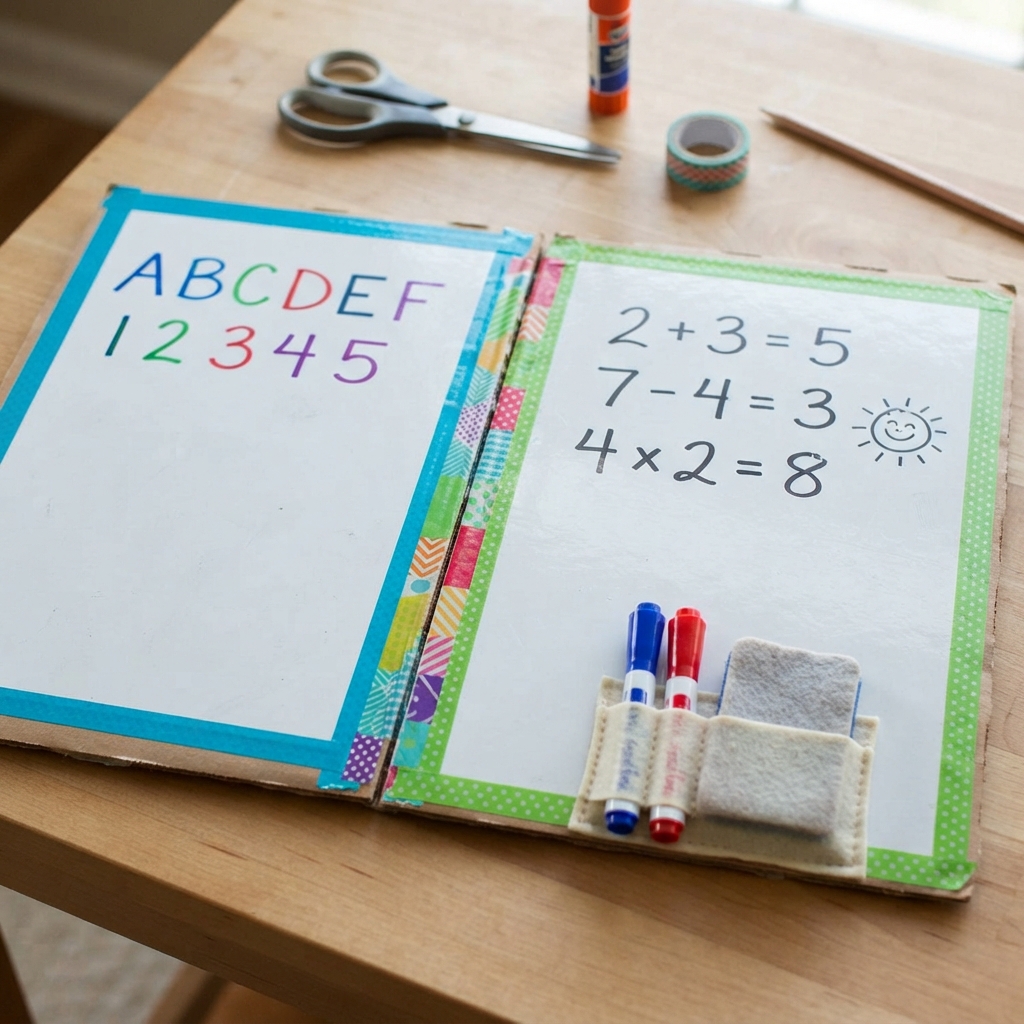
A small foldable whiteboard can have two panels, similar to a book. When it is open, the two sides create a larger writing surface. When it is closed, it becomes compact and easy to store.
The board can be designed in different sizes. A small version may fit on a desk, while a larger version can be used by several students.
The most important feature is that the surface should be smooth enough for a dry-erase marker and easy to clean.
Why Make a Small Foldable Whiteboard?
There are many reasons to make a homemade whiteboard. First, it is inexpensive. Most of the materials can be found at home or purchased at a low cost.
Second, the board is reusable. Unlike paper, it can be written on and cleaned many times.
Third, the foldable design makes it portable. Children can take it from one room to another or carry it in a backpack.
It is also useful for classroom activities. Teachers can use small boards for quizzes, spelling practice, mathematics exercises, drawing games, and group activities.
Materials Needed
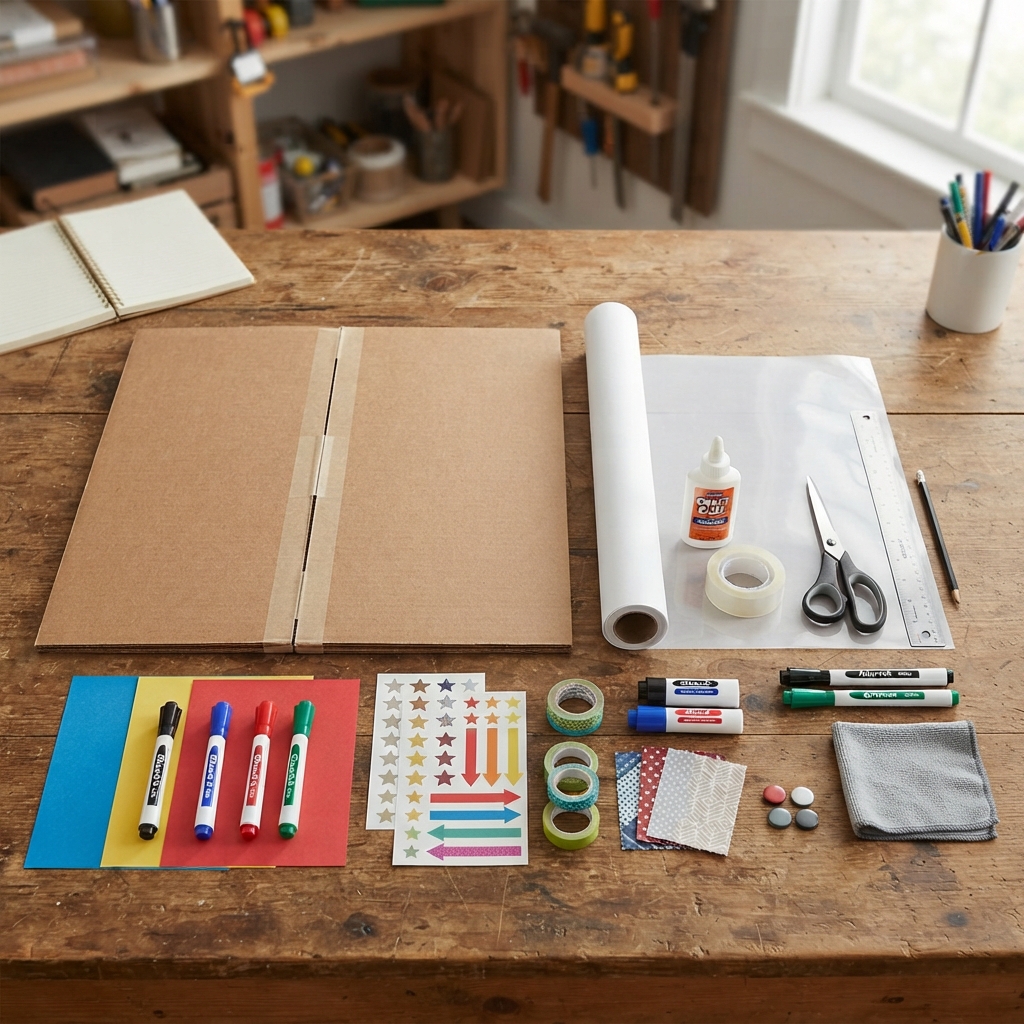
The main materials include two pieces of strong cardboard, white paper, transparent plastic or a smooth laminating sheet, glue, tape, scissors, a ruler, and a pencil.
Dry-erase markers are needed for writing on the finished surface.
Optional materials include colored paper, stickers, labels, decorative tape, fabric, magnets, and a small cloth for cleaning.
The cardboard should be thick enough to remain flat when the board is opened.
Choosing the Cardboard
The cardboard forms the structure of the whiteboard. Old shipping boxes, cereal boxes, or packaging materials can be reused.
For a small board, two pieces of cardboard of equal size are ideal.
The edges should be straight. If the cardboard is bent or damaged, it may be difficult to create a flat writing surface.
Children can ask an adult to help cut thick cardboard if necessary.
Measuring the Panels
The two cardboard panels should be approximately the same size.
For example, each panel could be about the size of a sheet of notebook paper. The exact dimensions depend on how large the finished whiteboard needs to be.
A ruler can be used to measure and mark the cardboard.
Keeping both panels the same size helps the board fold evenly.
Covering the Cardboard
The cardboard should be covered with white paper to create the base of the writing surface.
White paper can be cut slightly larger than the cardboard and folded around the edges.
Glue or double-sided tape can hold the paper in place.
The paper should be smooth and free from wrinkles because uneven areas can make the finished board look messy.
However, ordinary paper alone may not be durable enough for repeated marker use. A plastic or laminated surface is better for a reusable whiteboard.
Creating the White Writing Surface
A smooth transparent plastic sheet can be placed over the white paper.
Another option is to laminate the white paper. Lamination creates a smooth surface that can be written on with dry-erase markers.
If laminating equipment is not available, a clear plastic sheet can be attached carefully over the paper.
The plastic should be smooth and firmly attached.
Before using the board, test the surface with a dry-erase marker to make sure the writing can be removed easily.
Connecting the Two Panels
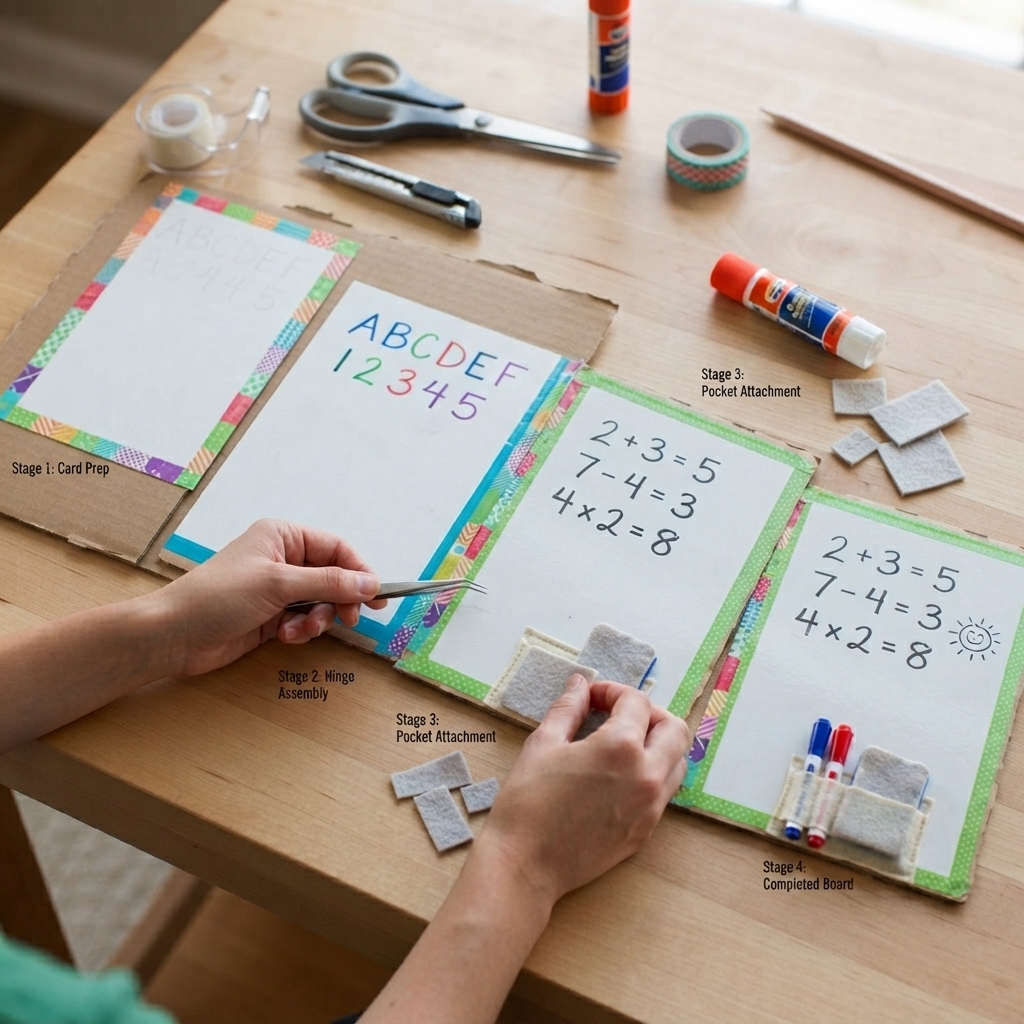
The most important part of the foldable design is the hinge.
The two cardboard panels should be placed next to each other with a small gap between them. This gap allows the panels to fold without pressing against each other.
A long strip of strong tape can be attached across the back where the two panels meet.
A second strip can be added for extra strength.
The tape acts as a flexible hinge. When the board is opened, the panels lie flat. When it is closed, they fold together.
Strengthening the Hinge
Because the hinge will be used frequently, it should be reinforced.
Additional tape can be placed along the upper and lower sections of the hinge.
However, too much tape can make the hinge stiff. The panels should still be able to move freely.
Children can test the board several times before adding decorations.
Decorating the Border
A border can make the whiteboard look more attractive.
Colored paper can be attached around the edges. Decorative tape can also create a clean frame.
For a school-themed whiteboard, children might use blue, green, yellow, or another favorite color.
A small label reading “My Whiteboard” can be placed in one corner.
The border should not cover the writing surface.
Adding a Marker Holder
A small marker holder can make the whiteboard more practical.
One simple option is to attach a small paper or cardboard pocket to the bottom edge of one panel.
The pocket can hold dry-erase markers when the board is not being used.
Another option is to use a short strip of elastic attached to the back of the board. The marker can slide underneath the elastic.
Any holder should be attached securely without interfering with the folding mechanism.
Adding a Cleaning Cloth
A small cleaning cloth can be kept with the whiteboard.
A piece of soft fabric can be folded and placed in a small pocket on the back.
This makes the board more convenient for children because they do not need to search for a cloth every time they want to erase something.
The cloth can also be decorated with a small paper label.
Using the Whiteboard for Schoolwork
The small foldable whiteboard can be used for many school subjects.
In mathematics, children can practice addition, subtraction, multiplication, division, fractions, and simple geometry.
In language lessons, students can practice spelling, vocabulary, sentence formation, and handwriting.
For science, they can draw diagrams of plants, animals, planets, or the water cycle.
The board can also be used for quick quizzes.
Practicing Letters and Numbers
Young children can use the board to practice writing letters and numbers.
Parents or teachers can write a model letter at the top of the board. The child can then copy it several times.
Because the board can be erased, children do not need to worry about making mistakes.
This creates a low-pressure environment for practicing writing skills.
Drawing and Creative Activities
The whiteboard is also useful for drawing.
Children can sketch animals, houses, flowers, people, shapes, and imaginary characters.
A teacher can ask students to draw something related to a lesson.
For example, during a science lesson about plants, children could draw a flower and label its parts.
Drawing on a reusable board can encourage experimentation because mistakes can easily be erased.
Educational Games
A small whiteboard can become a game board.
One player can draw a simple picture while another player guesses what it represents.
Teachers can create vocabulary games where students write answers on their boards and hold them up at the same time.
Mathematics games can involve solving problems as quickly as possible.
These activities can make classroom learning more interactive.
Using the Board at Home
Parents can use the whiteboard for daily routines.
Children can write reminders, practice spelling words, or complete short exercises.
The board can also display a daily schedule. For example, a child can write school, homework, reading, playtime, and bedtime activities.
Because the board folds flat, it can be stored easily after use.
Creating a Two-Sided Board
A foldable whiteboard can have different functions on each side.
The inside panels can have white surfaces for writing.
The outside panels can be decorated or covered with colored paper.
Alternatively, one side can be a whiteboard while the other side can be a blackboard or a magnetic learning board.
This makes the project more versatile.
Adding a Magnetic Section
For an advanced version, a thin magnetic sheet can be attached to the back of one panel.
Small magnetic letters, numbers, or shapes can then be used with the board.
This creates an interactive learning surface.
However, magnets and small pieces should be kept away from very young children.
Personalizing the Whiteboard
Every child can design a different whiteboard.
The border can include the child’s name, favorite colors, stars, animals, or school symbols.
A student might create a science-themed board with planets and rockets. Another might create a nature-themed board with leaves and flowers.
Personalization makes the board more enjoyable to use.
Recycling and Environmental Benefits
Making a foldable whiteboard from cardboard encourages recycling.
Instead of throwing away packaging boxes, families can reuse them for useful projects.
This teaches children that waste materials can have a second life.
The reusable writing surface also reduces the amount of paper needed for repeated practice.
A homemade whiteboard therefore combines creativity with environmental awareness.
Educational Benefits
Using a foldable whiteboard supports active learning.
Children can write answers, draw diagrams, solve problems, and immediately erase their work.
The activity develops hand-eye coordination and writing skills.
It also encourages independent learning because children can create their own exercises and check their answers.
Teachers can use the boards to quickly see whether students understand a lesson.
Safety Tips
Children should use scissors carefully and ask adults for help when cutting thick cardboard.
If a craft knife or laminating machine is required, an adult should handle it.
The edges of cardboard should be covered or smoothed so that they do not scratch hands.
Dry-erase markers should be used according to their instructions and kept away from very young children.
The board should be stored in a safe place when it is not being used.
Conclusion
Making a small foldable whiteboard is a practical and creative project that can be completed with simple materials. Cardboard, white paper, plastic covering, tape, glue, and dry-erase markers can be transformed into a reusable educational tool.
The folding design makes the board easy to carry and store. Its reusable surface makes it ideal for writing, drawing, practicing schoolwork, playing educational games, and organizing daily activities.
The project also provides valuable lessons about recycling, planning, construction, and creativity. Children can personalize their boards with colorful borders, name labels, marker holders, and cleaning-cloth pockets.
Whether used at home or in the classroom, a small foldable whiteboard can make learning more interactive and enjoyable. It gives children a surface where they can experiment without worrying about mistakes because everything can be erased and tried again.
Most importantly, this simple craft demonstrates that useful learning tools do not always have to be expensive or complicated. With a little creativity and some recycled materials, an ordinary cardboard box can become a portable whiteboard that supports learning, creativity, and everyday organization.