Making a school bus from cardboard is a fun, creative, and educational craft project for children. A simple cardboard box can be transformed into a colorful miniature school bus with wheels, windows, seats, doors, and other details. This project is especially suitable for students who enjoy building models, working with recycled materials, and creating objects with their hands. It can also be used as a school project, classroom activity, or weekend craft at home.
A cardboard school bus is not only entertaining to make but also teaches children important skills. While building the model, children practice measuring, cutting, drawing, gluing, decorating, and organizing materials. They also learn how ordinary objects can be reused instead of thrown away. With imagination and patience, a piece of cardboard can become a realistic miniature vehicle.
Why Make a Cardboard School Bus?
School buses are familiar to many children because they are an important part of school transportation. They carry students safely between their homes and schools every day. Creating a miniature school bus gives children an opportunity to think about how a real bus is designed and organized.
A cardboard model can also help children understand basic shapes and structures. A bus has a long rectangular body, large windows, circular wheels, doors, seats, mirrors, lights, and other parts. Building these features from cardboard allows children to explore how different shapes can work together to create a recognizable object.
The project is also environmentally friendly. Instead of purchasing a plastic toy, children can use an old cardboard box and other recycled materials. This teaches an important lesson about reducing waste and giving old objects a new purpose.
Materials Needed
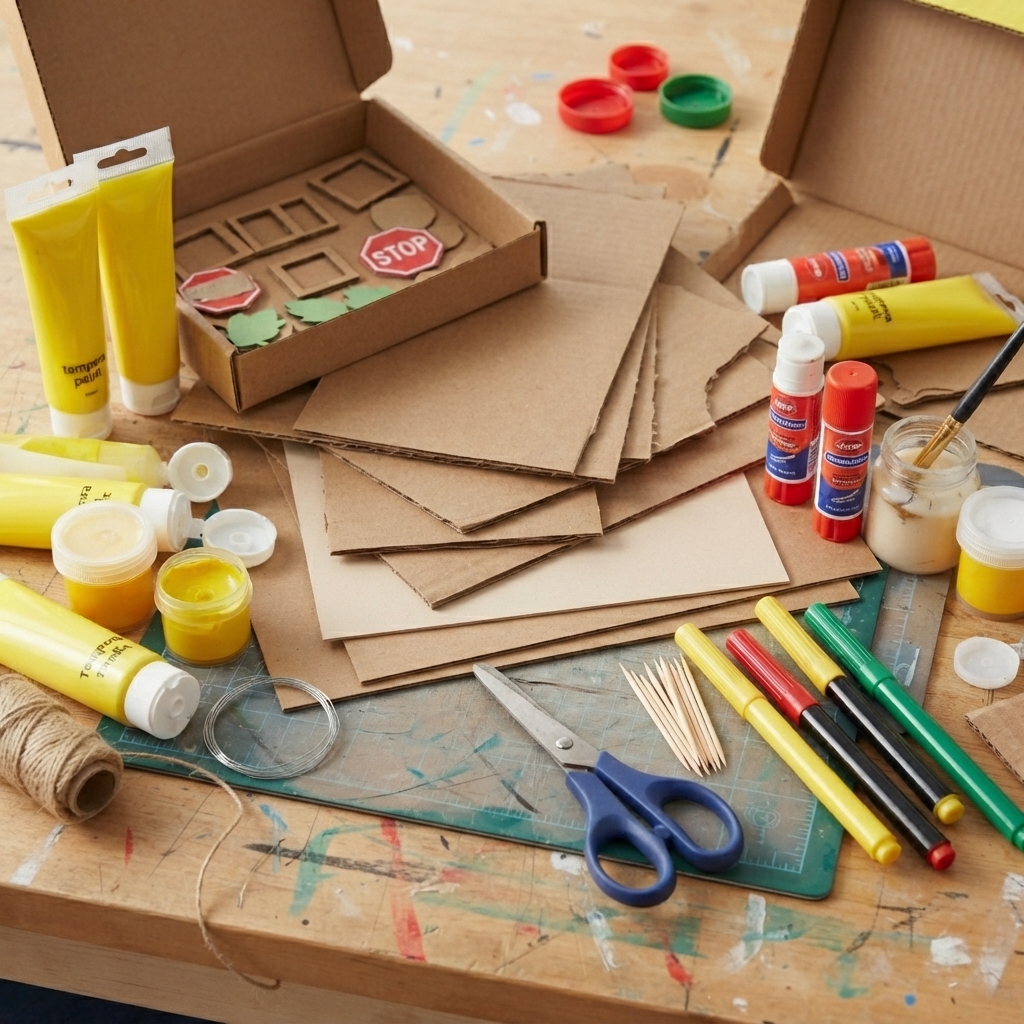
The materials for a cardboard school bus are simple and inexpensive. The main material is a cardboard box. A shoebox, cereal box, delivery box, or another medium-sized cardboard container can work well.
Other useful materials include yellow paper or yellow paint, black paper, white paper, cardboard scraps, glue, tape, scissors, a ruler, a pencil, and colored markers. Bottle caps can be used to create wheels, while small pieces of cardboard can be used for doors, seats, mirrors, and other details.
Optional materials include craft sticks, string, straws, buttons, stickers, aluminum foil, and small pieces of transparent plastic. Children can choose materials based on the design they want to create.
Before beginning, all materials should be placed on a clean table. Having everything ready makes the project easier and prevents interruptions during construction.
Choosing the Right Cardboard Box
The shape of the box is important because it will become the main body of the bus. A long rectangular box is usually the best choice.
A shoebox can create a small bus that is easy for children to handle. A larger box can be used to create a bigger model with more details. The box should be strong enough to hold decorations and wheels.
If the box has printed words or pictures on it, the outside can be covered with plain paper before decorating. This creates a clean surface for the school bus design.
Children should examine the box and decide which side will become the front, which side will become the back, and which sides will contain the windows.
Preparing the Bus Body
The first major step is preparing the cardboard body. If necessary, tape the box closed so that it becomes a strong rectangular structure.
The long sides of the box will become the sides of the school bus. One short side will be the front, and the other will be the back.
The bus can be covered with yellow construction paper or painted yellow. The traditional school bus appearance makes bright yellow an excellent choice, but children can also create a personalized bus using different colors.
After applying paint or paper, allow the surface to dry completely before adding additional decorations.
Drawing the Windows
Windows are one of the most recognizable parts of a school bus. They can be created by drawing rectangles along both long sides of the cardboard box.
A ruler helps make the windows even. Children can draw several rectangular windows in a row, leaving enough space between them for the bus frame.
The windows can be colored black, dark blue, or another contrasting color. Alternatively, pieces of transparent plastic can be attached behind the openings to create a glass-like effect.
The driver’s window should be placed near the front of the bus. Additional windows can be added along the passenger section.
Creating the Bus Door
The door is another important detail. A rectangular piece of cardboard can be cut and attached to the front side of the bus.
The door can be drawn with a black marker or covered with colored paper. A small handle can be created using a piece of string or a thin strip of cardboard.
For a more interesting model, the door can be attached with tape so that it opens and closes. This gives the school bus a moving feature and makes the model more interactive.
Making the Wheels
No school bus is complete without wheels. Wheels can be made from cardboard circles or recycled bottle caps.
If using cardboard, children can trace around a circular object such as a cup to create evenly sized circles. Two or four circles can be used depending on the design.
The wheels can be colored black, with smaller gray or white circles in the center representing the wheel hubs.
To attach the wheels, cardboard strips can be used as supports. If children want the wheels to rotate, they can experiment with simple axles made from straws or wooden sticks, with adult supervision when necessary.
Even stationary wheels can look very realistic when they are carefully positioned.
Adding the Seats
The inside of the bus can be decorated with miniature seats. Small strips of cardboard can be folded and glued together to create rows of seats.
The seats can be colored red, blue, gray, or another color. They should be positioned behind the windows so that people looking at the model can see them.
A small piece of cardboard can also be placed at the front to represent the driver’s seat.
Creating the interior is optional, but it makes the project much more detailed. Children who enjoy miniature models may especially enjoy designing the inside of the bus.
Making the Driver
A miniature driver can be added to the front of the bus. The driver can be made from paper, cardboard, or modeling clay.
A simple paper figure can be drawn, colored, cut out, and attached to the driver’s seat. Children can add facial features, hair, clothing, and other details.
A steering wheel can be made from a small cardboard circle. This can be attached in front of the driver to make the front section more realistic.
Adding Students
Students can also be created and placed inside the bus. Small paper figures can represent children sitting in different seats.
The figures can have different hairstyles, clothes, backpacks, and colors. This gives children an opportunity to use their imagination and make every passenger unique.
Instead of creating many detailed figures, children can use small silhouettes or simple paper shapes. The goal is to make the bus look occupied rather than to create perfect miniature people.
Creating School Bus Signs
Signs make the model easier to recognize. A large sign reading “SCHOOL BUS” can be placed above the windows or on the front and back.
The words can be written with a black marker on yellow paper. Children can also create smaller warning signs or symbols.
A stop sign can be added to the side of the bus. This can be made from a small piece of red cardboard attached to a craft stick or folded strip.
These signs also provide an opportunity for children to learn about road safety and transportation symbols.
Adding Headlights and Taillights
Small details such as headlights can make a big difference. White or light-colored paper circles can be attached to the front of the bus as headlights.
Red paper circles can be used for taillights. Small bottle caps, buttons, or beads can also serve as lights.
Markers can be used to draw lines around the lights and create additional details.
These features help children observe the design of real buses and reproduce some of their most recognizable characteristics.
Making Mirrors
School buses have mirrors that help drivers see around the vehicle. Small pieces of cardboard can be used to create side mirrors.
A thin strip of cardboard can act as the mirror support, while a small rectangle or circle represents the mirror itself. The mirror can be covered with black, gray, or silver paper.
Although these details are small, they can make the model more realistic.
Decorating the Roof
The roof can remain simple or receive additional decorations. Children can draw lines, vents, or other features.
A small cardboard sign can be placed on top of the bus. Alternatively, children can create a raised roof section using folded cardboard.
It is important not to add too many heavy decorations because they can make the cardboard model difficult to handle.
Creating a Road for the Bus
The project can become even more exciting by creating a small road underneath the bus. A large piece of cardboard can be painted or covered with black paper to represent asphalt.
White or yellow lines can be drawn across the road. Children can add sidewalks, trees, traffic signs, houses, and school buildings.
This transforms the single bus into a miniature school transportation scene.
A small cardboard school can be placed at the end of the road. Trees can be made from paper, while small pieces of cardboard can represent buildings.
Adding a School Building
A school building can be created from another small cardboard box. The front can be decorated with windows, a door, and a sign reading “SCHOOL.”
This makes the project more educational because it shows the relationship between transportation and school.
Children can create a complete scene in which the school bus arrives at the school entrance. Small paper students can stand near the door, while miniature trees and sidewalks make the environment more realistic.
Using Recycled Materials
One of the most valuable lessons from this craft is the importance of recycling. Cardboard boxes, bottle caps, paper scraps, old packaging, and other household objects can be reused.
For example, a cereal box can provide cardboard for wheels and seats. Bottle caps can become tires. An old magazine can provide colorful pictures for decorations. Paper tubes can be transformed into trees or poles.
Reusing these materials reduces waste and encourages children to think creatively about everyday objects.
Educational Benefits
Building a cardboard school bus develops several important skills. Children practice fine motor skills when cutting, folding, drawing, and gluing. They develop spatial awareness when deciding where different parts should go.
The activity also encourages problem-solving. A child may discover that a wheel is too large or that a piece of cardboard does not fit properly. Instead of giving up, the child can measure the part again and find a better solution.
The project can also support lessons about transportation, road safety, recycling, community workers, and school life.
Safety Tips
Safety should always be considered when making cardboard crafts. Children should use scissors carefully and ask an adult for help with difficult cutting tasks.
If hot glue, craft knives, or other sharp tools are needed, they should only be used by adults or under close adult supervision.
Glue and paint should be used in a suitable workspace. Children should wash their hands after completing the project and keep small materials away from very young children.
A safe project is a more enjoyable project.
Displaying the Finished School Bus
When the school bus is finished, it can be displayed in a classroom, bedroom, library, or school exhibition.
Students can place the bus on a cardboard road and surround it with miniature buildings and trees. A small label can explain that the model was made from recycled cardboard.
Children can also present the project to their classmates. They can explain how they made the body, wheels, windows, seats, and decorations.
This presentation helps develop confidence and communication skills.
Conclusion
Making a school bus from cardboard is an enjoyable craft that combines creativity, recycling, design, and education. An ordinary cardboard box can be transformed into a colorful miniature vehicle with windows, wheels, seats, doors, signs, lights, and passengers.
The project teaches children that they do not need expensive materials to create something impressive. With cardboard, paper, glue, markers, and recycled objects, they can build a detailed model using their own imagination.
More importantly, the activity encourages patience and problem-solving. Children must plan their design, measure different parts, choose suitable materials, and solve construction problems along the way.
A cardboard school bus can also become part of a larger miniature world containing a road, school, trees, traffic signs, and students. This makes the activity even more engaging and provides opportunities to learn about transportation and road safety.
Whether it is made for a classroom assignment, a craft exhibition, or simply for fun, a cardboard school bus is a wonderful example of how creativity can transform simple recycled materials into an educational and meaningful project.